Object Mockups
Watch our how-to video to find out more details
Watch the full video, where we show how to edit and personalize our packaging mockups, we hope you guys will like it. If you want us to create more tutorials and videos on how to use Yellow Images products - just contact us and share your feedback.
In this tutorial we are going to show you how to work with mockups, which contain a 3D smart layer. We’re going to take a packaging mockup as an example, but this guide relates to all the rest of products with 3D smart layers as well.
TIP: The mockups with 3D smart layers are only supported by Adobe Photoshop CC 2015 and younger versions. Please bear in mind that the way 3D smart layers function in Photoshop CC 2020 is different from the versions released in 2015-2019.
If you use Photoshop CC 2020 or any newer version, you should change the settings of the 3D smart layer before applying your design on the mockup to make sure it works correctly. Here’s what exactly you need to do.
Select the 3D smart layer in the Layers window. Smart layers are always marked with the blue grid, that’s how you can recognise them. Proceed to the 3D window that will open right away and select Scene. Once done, switch to another window “Properties” and find the Surface section in it. Now you need to work with the Styles drop-menu - it’s pretty straight forward, you’ll see the drop-menu right next to the sign ‘Styles’. Click on it and select Unit Texture.
If the 3D and Properties windows don’t appear right away and you can’t see them anywhere in your Photoshop, you should enable them in the Window menu on the top panel of your Photoshop.
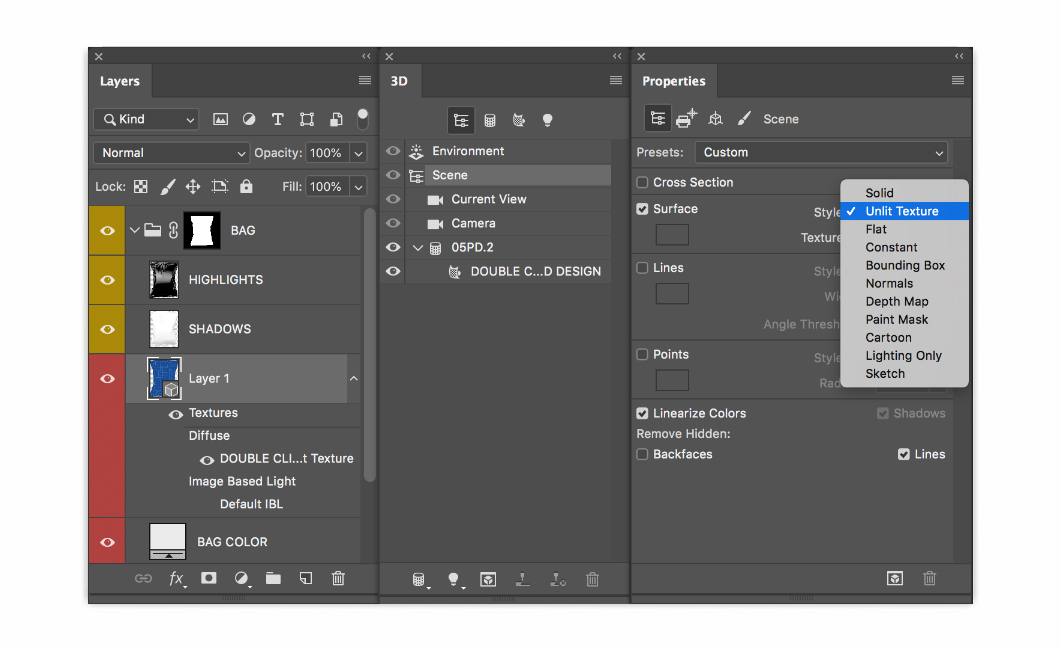
That’s it! These steps will ensure the flawless work of the 3D smart layers if you use Photoshop CC 2020 and newer editions.
Now let’s get started. Open the file and pass on to the DESIGN layer. Make sure that the additional options of the layer are enabled (a tiny arrow on the right).
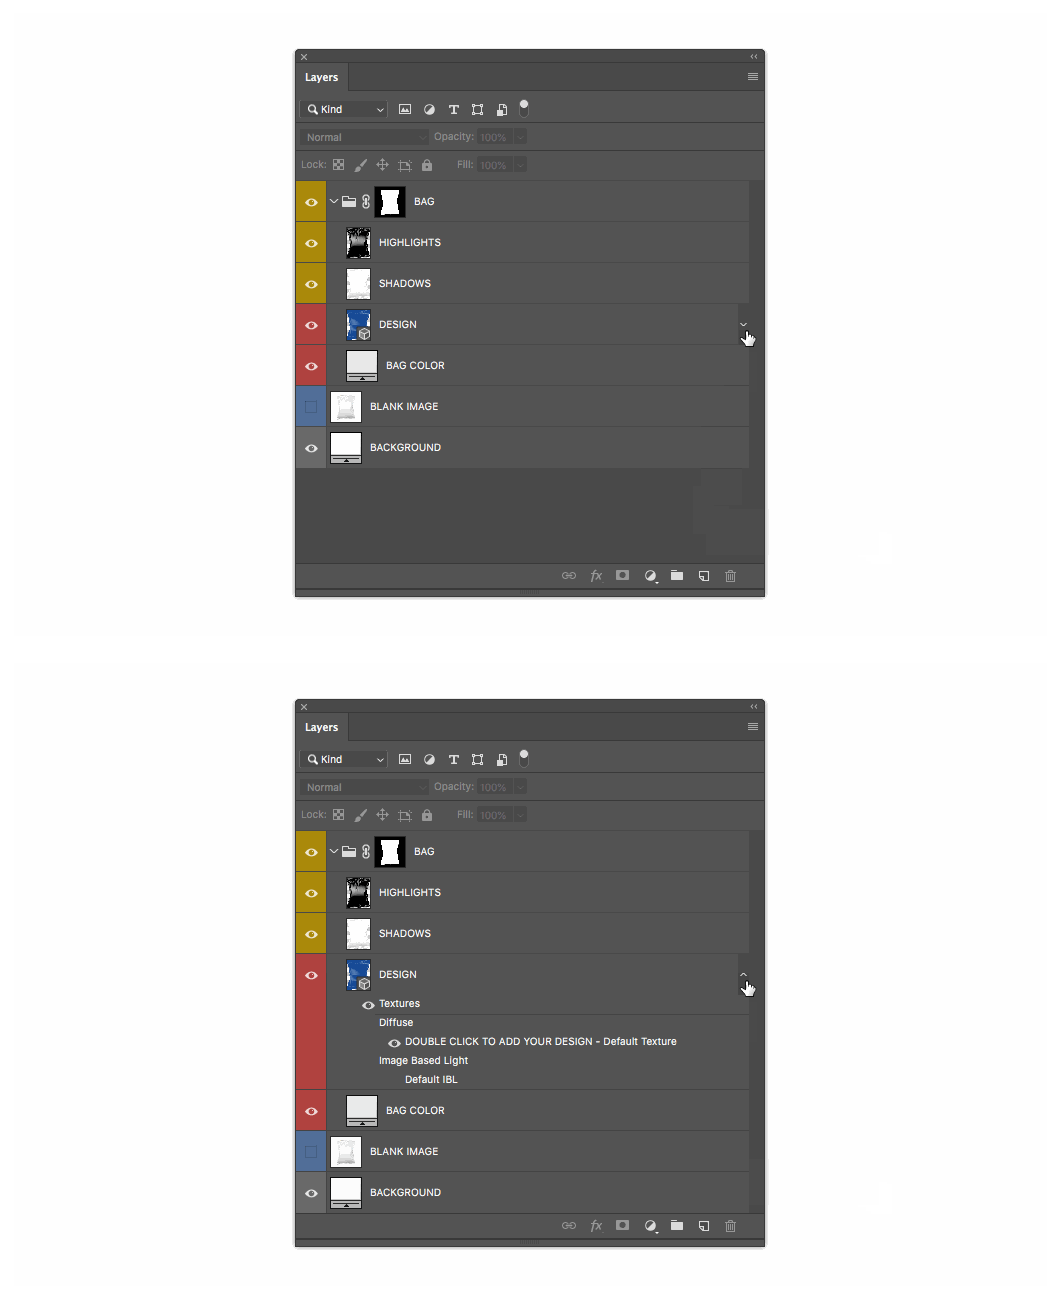
Doubleclick on the DOUBLE CLICK TO ADD YOUR DESIGN sign. The new file with auxiliary layers will open in a new window. These auxiliary layers will make it easier for you to place your design.
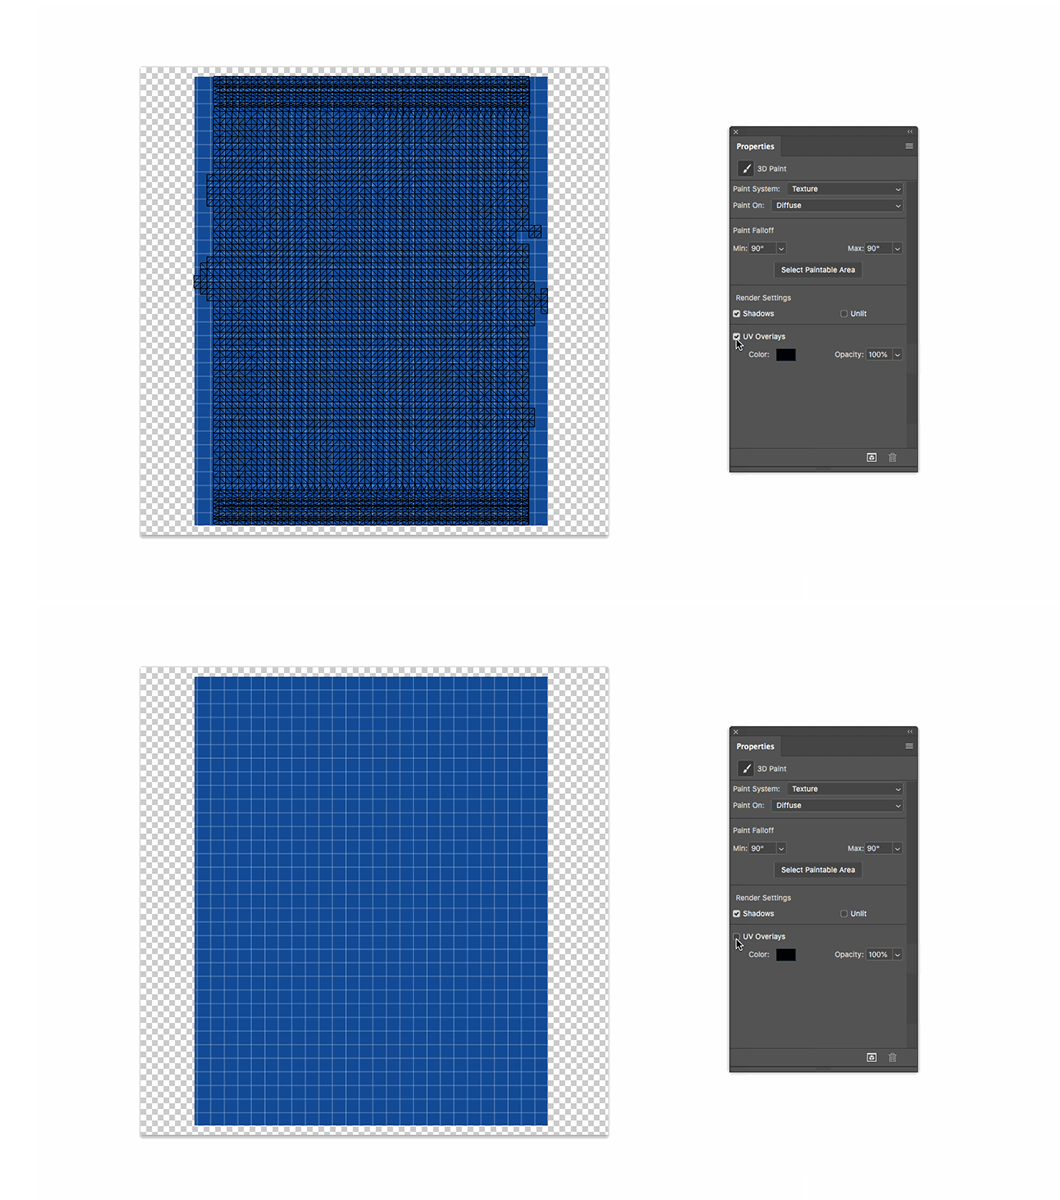
You’ll also see the black grid appear upon all the layers. You can always switch it off by unchecking the UV Overlays box in the Properties section. In some versions of Photoshop this grid may not get displayed.
Use COLOR layer to recolor the entire object.
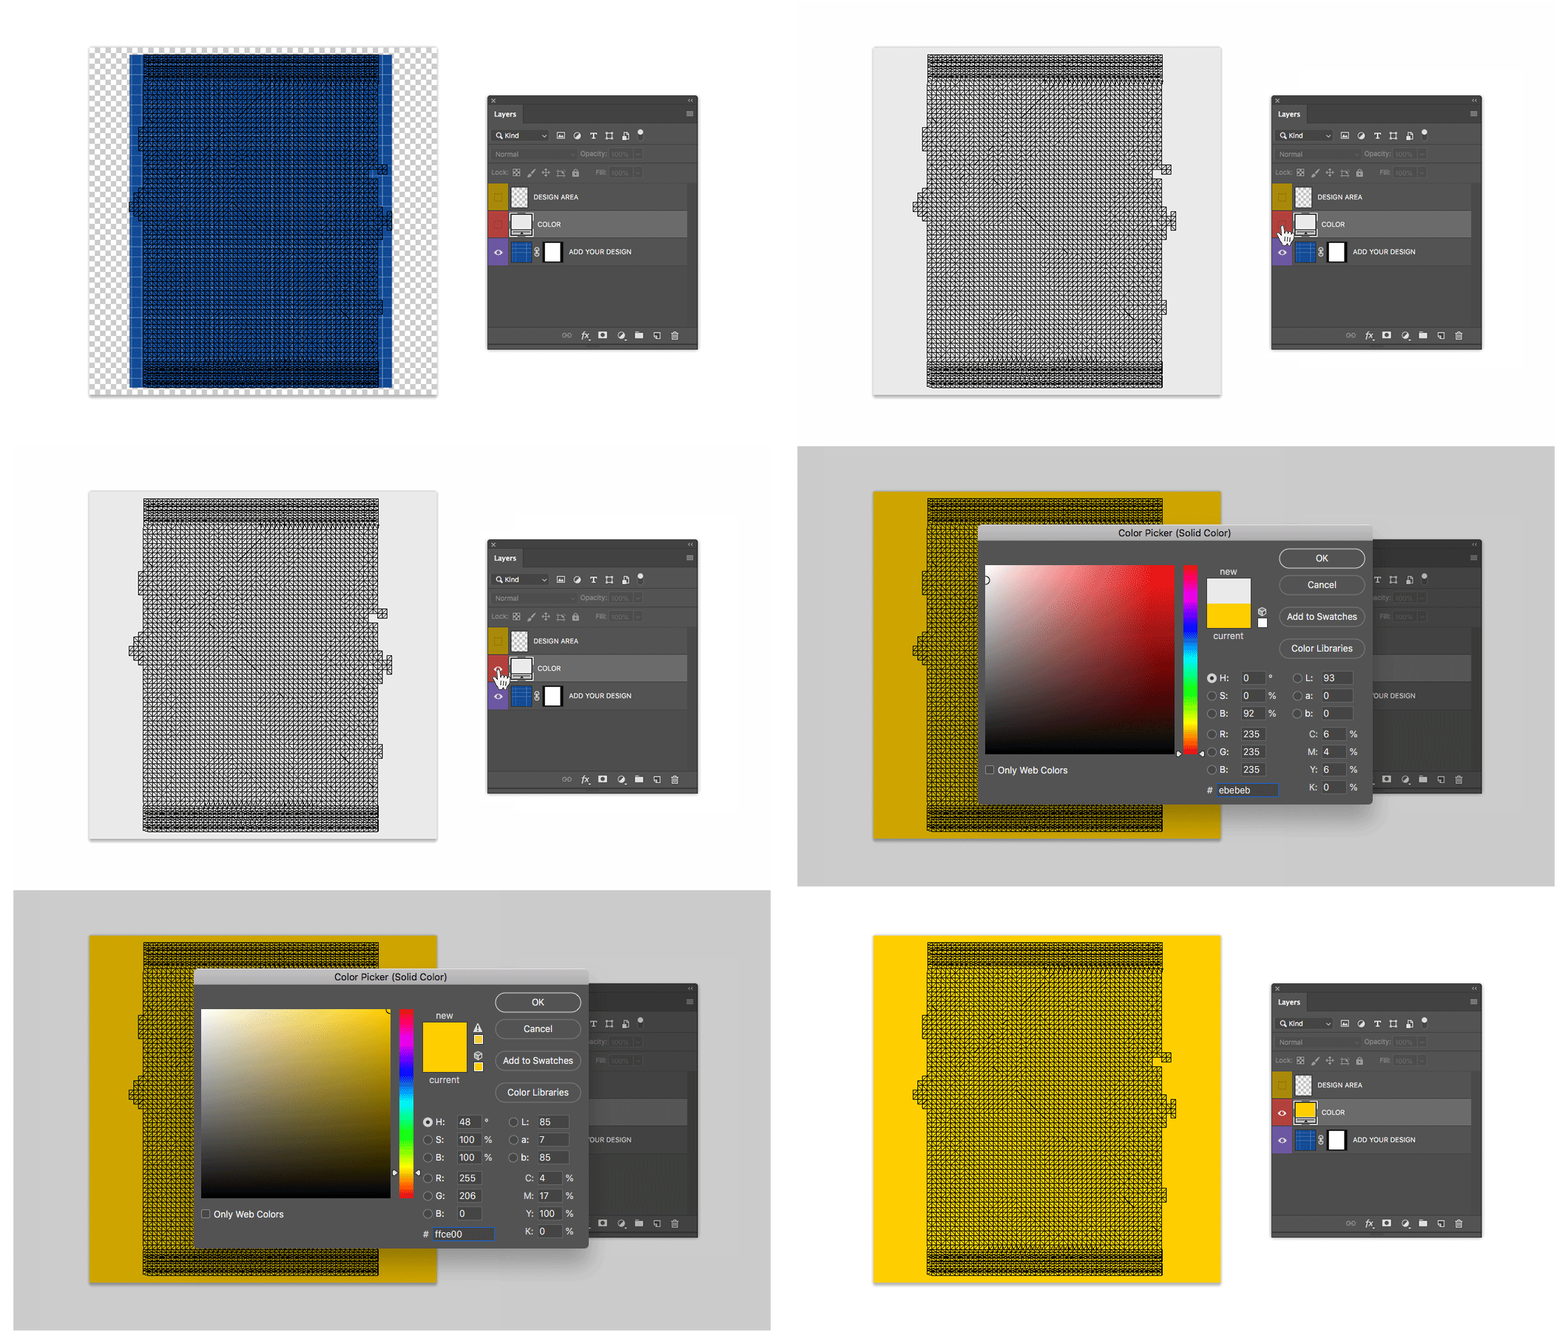
Place your design navigating within the edges of the blue grid, and once you’re satisfied with the result, just save and close the file.
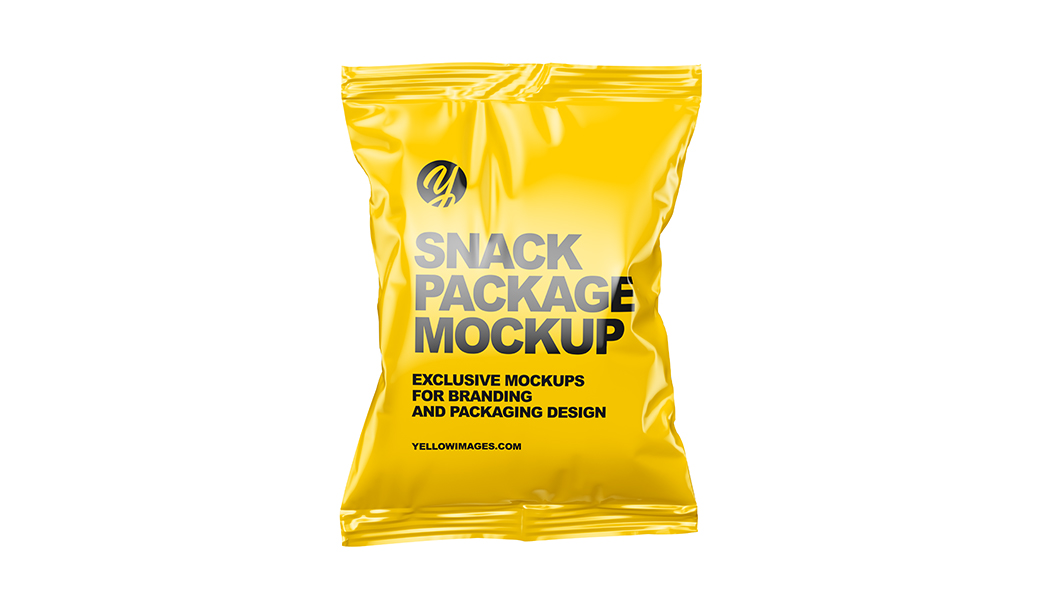
To get the final polished look we need to launch the render of the 3D layer with the applied design, this way the texture will obtain much higher quality.
Click on the 3D layer with the right mouse button and pick Render 3D Layer. You can stop the render once you are happy with the result (to stop rendering press ESC key or click at any other layer).
The render has been completed but you’re still not satisfied with the image? Increase the Canvas Size inside of the file with the design and render the layer with the design once again.
